

Featured Image: Front Row Cheer Photos & FloCheer
I get so many messages asking for needle stretching tips and there are so many components involved it’s hard to describe everything in a short DM – so here’s a full description!
A needle is quite difficult to do and should be trained properly to avoid injury. This means knowing which areas to stretch and which muscles to engage in the position.
Just because someone has a needle that looks nice does not mean they are doing it safely or correctly.
So that you can get a better idea of what exactly is required of your body to bend into this position, let’s break it down into upper body and lower body sections.
Upper Body
Forget the Lower Back
Your shoulders and spine are the key areas involved here. Many people think the lower back is where all the bend should come from, but this is not true. In fact, trying to bend the lower back as much as possible is dangerous for the spine.
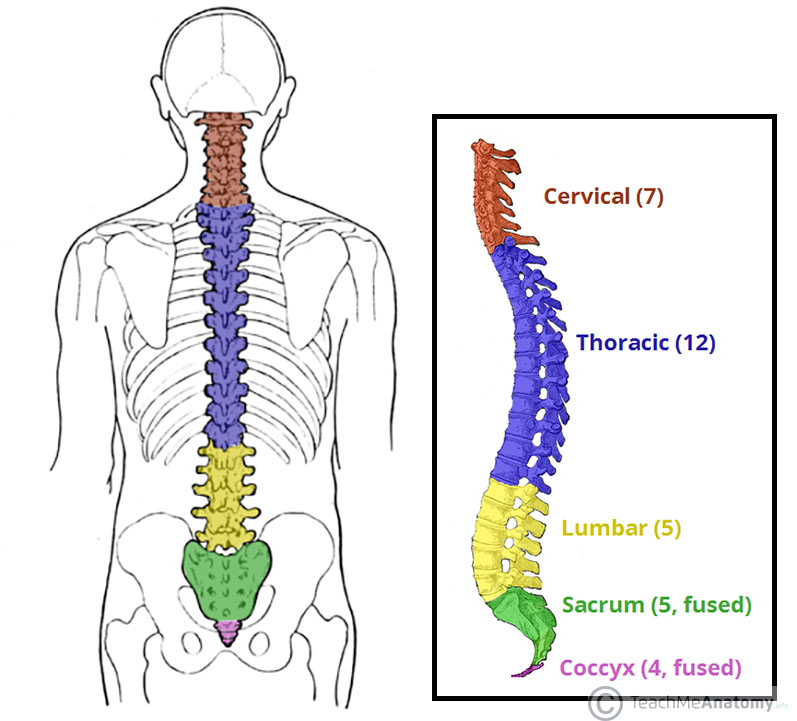
Take a look at this image highlighting the different sections of the spinal column. The yellow (lumbar spine) is where most people try to bend through when doing bridges, scorpions, needles, etc.
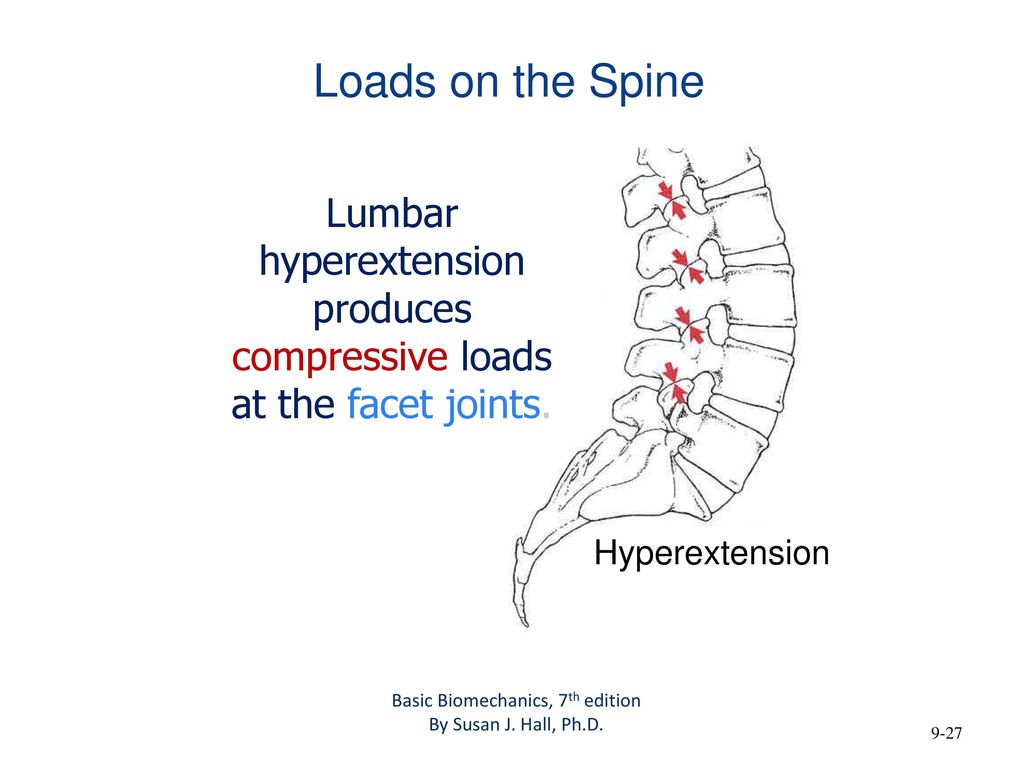
Although you do need some movement here when back bending, you shouldn’t rely only on that section. If you do, you end up placing compressive loads on the small joints of the vertebrae, which can cause back pain or even stress fractures if done enough.
Instead, you want to bend more through the blue area (thoracic spine), which will take load off of your lower back and allow you to bend further.
Improving mobility in this area of your spine will also allow your shoulders to move more, making it easier to raise your arms overhead and reach back to grab your leg.
Get Your Shoulders Moving

To further help the back bend, you must also improve the flexibility of your pectoralis minor and latissimus dorsi. These muscles help to bring your arms overhead.
Your pectoralis minor, or pec minor for short, lays underneath your pec major, which is the main chest muscle you probably already know of. The pec minor attaches to your ribs and scapula (shoulder blade). Since your shoulder blade must move to allow your arm to lift overhead/up by your ears, a tight pec minor will restrict this movement.
Your latissimus dorsi, or lats for short, are located on your back. The majority of the muscle originates from your thoracic spine (discussed above) and attaches onto your humerus (upper arm bone). By looking at the photo, you can see the lat on the right side will need to lengthen to allow the right arm to raise up overhead. If your lats are tight, it will be much harder to move your arm this way.
Lower Body
The hip and leg muscles are often ignored when stretching for a needle. If you look at the position, it requires a perfect split at minimum, so stretching the lower body is equally as important as the upper body!
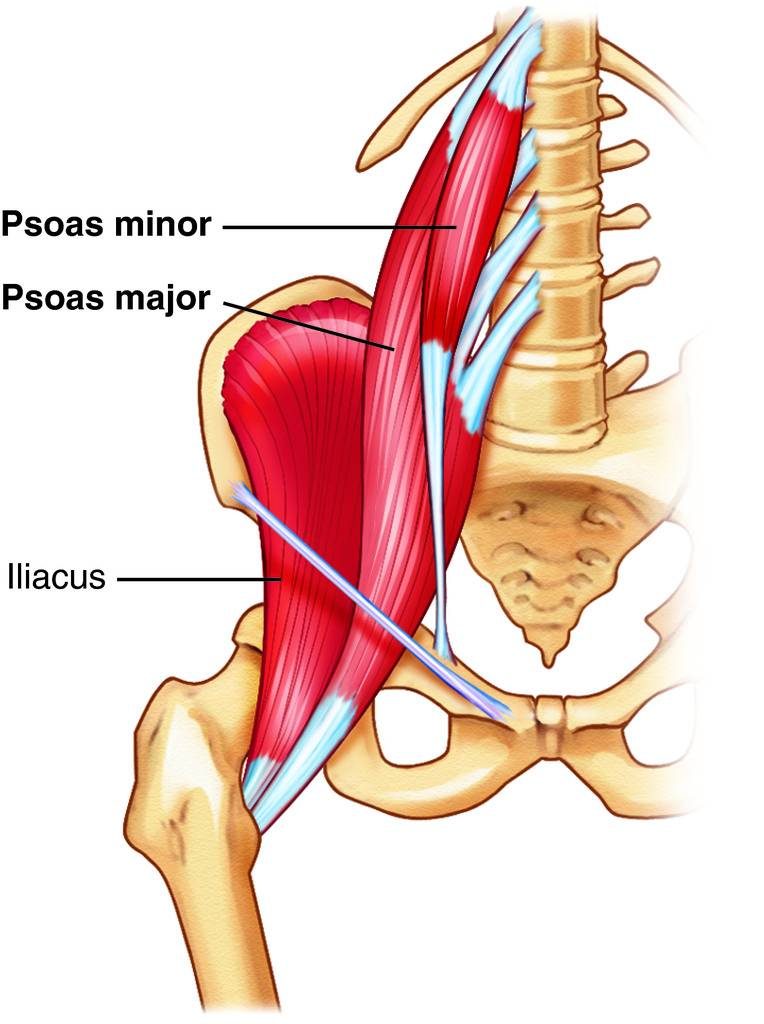
There are two main muscle groups that require stretching: the hamstrings and hip flexors.
The hamstrings are a group of muscles located on the back of your thighs and the hip flexors are a group of muscles located on the front of your hips, attaching to your spine.
When pulling a needle, your bottom leg requires hamstring flexibility and your top leg requires hip flexor flexibility. Splits require the same muscles to be stretched; front leg involves the hamstrings and back leg involves the hip flexors.
Therefore, when stretching for a needle, focus on getting a 180 degree split or an oversplit with correct alignment.
The importance of a split with proper hip alignment cannot be stressed enough! If your back hip/leg tends to turn out when doing splits, re-position yourself so your kneecap is facing straight down into the floor. You will most likely go higher up in your split and feel like you became less flexible, but in this position you will be able to stretch the right muscles and place less strain on your hip joint.
How to Hold a Needle
It’s important that you hold your needle with the right posture, not just so it looks pretty but also so you don’t stress your joints.
Square Those Hips
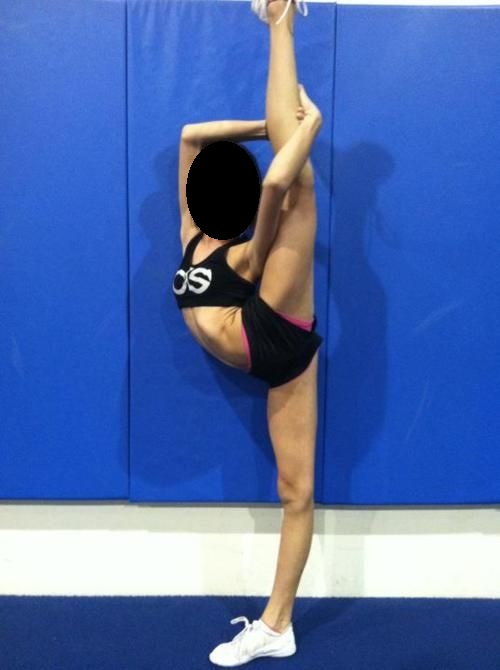
Like when doing the splits, you want your hips to remain square – meaning the hip of your top leg doesn’t turn out to the side. The photo below shows incorrect alignment of the hips.
Instead, you want your knee to face backwards, like this photo.

Keep Your Chest Facing Forward
You should avoid trying to twist your upper body to get closer to your leg. Bending to the side is faking a needle in a way, since your spine is not properly aligned.
If you find you have trouble getting your opposite arm (if you’re pulling a left leg needle, this would be your right arm) up to your leg, work on stretching everything on the opposite side. This includes trying to pull needles on your “bad” side.
Engage Your Glutes
The last, and one of the most important things to focus on, is engaging your glutes! You must use your butt muscles when doing any type of back bending, especially if you complain about low back pain.
Your glutes act as a hip extensor, meaning they help pull your leg behind you. If you engage them while you stretch, more of your back bending motion will come from your hips, rather than your lower back. This decreases the compression on your spine, especially when combined with improved thoracic spine and shoulder mobility!
Reminders & Key Points
- Stretching takes time… lots of time! Be patient.
- Stretch consistently, at least a few days a week
- Always do a thorough warm up before stretching
- For needles, focus on improving your shoulder & T-spine mobility, and your hip flexor & hamstring flexibility
- Engage your glutes and keep everything square
If you or your team would like help with getting a needle, please visit the Training Programs tab for more information on flexibility programs.
Recent Comments